Friday 25 December 2015

EGYPTIAN PYRAMID CARD

EGYPTIAN CARD - FRONT
I made this card a while ago for a demo, so it includes a few tips techniques that you can use more widely in your other cardmaking.
- You can shape your 3Ds by gently rubbing the middle of the reverse side in the palm of your hand until the edges start to curl a little. This adds dimension but also hides any foam tape/silicone glue that is underneath.
-Use the colours in the card topper as a guide for what colours to use elsewhere in your card.
The colours do not have to be the most obvious ones.  In this case I've used the gold, green and red from the band on the hat and frame around the central motifs.
-Decoration doesn't always have to be stacked on top.  It can also go underneath - in this case I've punched four windows and lined up the paper underneath (It also means you don't have to measure the paper accurately, and you can chop out the mistakes made in other projects and still use your paper.
-Do remember that a single fold card has a front, a middle and a back, and all of these surfaces can be decorated.  In this case I've used colours from the front of the card, edging from the 3D sheet (available from Regal Craft Cards) and a few cut into a gold insert to convey the idea of a pyramid.(Actually this time of year, its looking a bit like a Christmas tree......but as I said, this was a card made to illustrate a few different techniques that you can use for all sorts of things, not necessarily to make "as is", although, really it does look a bit like a pyramid in reality!)


EGYPTIAN CARD - INSIDE

Tuesday 22 December 2015

NEW DIES

I walked in the door at work this morning to find a big box of new dies, so I thought I'd do a quick post to let you know that the Padova collection from Ultimate crafts (nature themed), Floral layers, and the Intricutz "Perfectly Petite" little doiley dies are in, so you have today and tomorrow (Wednesday) if you want some NOW....otherwise Regal Craft re opens on Monday 4th January so we might see you then!

Friday 18 December 2015

STEPPER CARD IN KRAFT AND WHITE

Kaiser made the paper, Regal made the base card, but Janet added the creativity to make this elegant floral stepper card.

Using the paper as as guide, she has centred pre-made paper flowers onto the bottom border.  The cut-out doiley doubles as a background for the large white flower.  The greeting also comes from the paper collection.  The only addition is some narrow cotton lace.

Lace can be a bit tricky to attach but Janet has neatly finished her embellishment by securing the ends underneath the paper topping the card.

I really love the  simple colour combination of natural and white - the contrast serves both well.

POSTSCRIPT...Janet says, that nice as the card is, it wasn't her who made it....Tania says it wasn't her.....its a mystery.......if anyone wants to "own" the card, let me know and I'll do an update...
PPS..The mystery has been solved.  Trudy Meijer just popped in to let me know that she was the craftsperson in question........sorry Trudy, and thanks for your lovely card!!

Wednesday 16 December 2015

LAST MINUTE CHRISTMAS CARD

CHRISTMAS STAR.
Clearly, if you are still making Christmas cards you don't want to be spending hours on the activity this time of year!!

This isn't quite a five minute card, but it is a good one to do on "a production line" i.e. make 8 or 9 at a go, and you'll have them done in no time.

The base is a small square textured singlefold card from Regal Craft Cards.  Choose quality cardstock, it makes all the difference to the final result!  The cards come with envelopes so you don't need to hunt around for those.

The card is topped with a square of gloss silver (it actually looks bluish) card and then with some patterned vellum.  Use doublesided tape to fix the vellum under where the star will go, that way you don't have to use extra time to attach it with split pins, spray glue or hidden edges.

The star is also from Regal and is made of thick shiny card.  It has been embossed with a folder - chose an all-over pattern that doesn't have a "right way up" so you don't have to spend ages positioning it in the folder.  If you use one of the larger folders you can do a couple at a time.

Pop a star split-pin in the middle of the star (make a little hole with a needle or piercer first) and attach it to the vellum and gloss card before sticking the whole lot onto the base.  You can add a little double sided tape to the star first to hold it in place, if you like (it's probably a good idea) but you don't need much as the split pin will do the hard work.

If you have an extra couple of minutes add an insert with a stamped greeting to the middle.  If not, just write your message inside and off you go!!

This will be the last Wednesday posting for the time being, but the regular Friday posts and updates will continue and if there is anything special to share or I find a little extra time(!) there will be a few random "extras" as well.

Friday 11 December 2015

HOW TO MAKE AN EASY EMBOSSED BORDER

3d ROSE WITH EMBOSSED BORDER
If you want to add a little bit of decoration to your base card but want to keep the main motif (in this case a 3D Sparklelight rose), then how about using your scoreboard and embossing tool to add some borders?

I've just used the envelope insert to achieve a 45degree angle and drawn down each line on the board - equal numbers of lines in each corner.  There are endless variations of how this can be done of course - its up to you.  You can use any colour as a base card, but for maximum impact you really can't go past smooth white!

If you don't have a scoreboard you can achieve similar results using an embossing tool in the channel of your slide cutter or even with a tool and ruler on top of a soft mat (you can get mats made specifically for embossing, but a firm mouse mat would do).  The latter won't be quite as effective as the cutter channel, which in turn won't be quite as good as the scoreboard, but its worth giving both a go with some scrap card to see if you like the results.

Wednesday 9 December 2015

MERRY CHRISTMAS CARDS - 3 VARIATIONS.

MERRY CHRISTMAS  CARDS
When Roma brought these cards in to show us, I really hoped that she would say "yes" when we asked if we could put them on the blog.  As you can see, it was.

I was keen to share these cards, not just because they're lovely (which they are) but to illustrate how one basic design and a single die can be used to achieve three very different effects.  The cards on either side feature different colour schemes, ribbons etc and the one in the middle not only has some very shiny red holographic paper as the backing for the ornament, but some cute little 3D critters in the background!

The "Merry Christmas" die from Craft Concepts is ideal for these larger cards and can even be used separately as a hanging ornament. These examples are A5 size, which makes the images large and clear (and quite tactile) and just right to make a big impact!
Now, here's a nice surprise, Roma just popped by, with another card, so I can revise the post's title to "4 Variations".  The new card (which so new the glue is still wet!) features an embossed white circle, a snazzy glitter card background and a silk flower.  Thankyou Roma!!!!

Friday 4 December 2015

ART DECO LADY PYRAMEX CARDS

CARDS FEATURING ART DECO LADIES
Couture Creations have been releasing some really lovely dies lately.

I have my share of image-specific dies (including just about all the recently released Australiana ones), but I find that the ones I go back to time after time are the nesting dies, frames, backgrounds and borders!

As you can see from the examples, this doesn't have to be as boring as it may sound.  As soon as I saw these dies I thought they would be the perfect accompaniment for these Art Deco ladies (both available on the same Sparklelight Pyramex sheet from Regal Craft Cards).

I've made both designs up on some shimmer card 10 x 15 cm (4 x 6 inches) so that all I have to do to finish is add a bit of bling and pop them into a Regal photoslot card.

Wednesday 2 December 2015

CHIRSTMAS CALENDAR CARD

CHRISTMAS CALENDAR CARD
Here's a good idea for a card and gift in one, and best of all, given the time of year, it won't take you forever to make.

Regal sell the pre-made stepper base cards and the little calendars.  All you need to do is add the decoration.

Sharon has added some cheerful Christmas papers, stickers and rhinestones, and a cute owl button to her example.

Friday 27 November 2015

SUPER BROTHER CARD

SUPER BROTHER CARD
When most of the attention is on a new baby, its important to let the other children in the family know that they're not forgotten.

A new great-nephew inspired this card, which wasn't quick to make, but certainly isn't difficult.

The base is a single fold white card from Regal Craft Cards and the background is Kaiser paper.
The little boy is a LalaLand stamp that has been stamped onto lots of different coloured papers, then cut out and re-assembled on a stamped base (i.e. paper pieced).  The very fine detail (the star on his constume, belt buckle and detail on boots) has been added with silver pen, and a little bit of colour to the face (lips and cheek) added with red pencil.  Finally just a little white dot using a gel pen has been put in the eyes to add a little "life."  Finishing details come from a bit silver star (from Regal) and some stickers - star borders and "Brother" (a gold sticker coloured over with a black marker pen).

Wednesday 25 November 2015

CHRISTMAS BOOK CARD

Regal already have pre-made book-shaped cards so if you want to do something a little different for Christmas this year you can buy a pack and get straight to the fun bit of decorating it!

I've taken the photo at a funny angle so rest-assured it doesn't really do justice to Sharon's pretty card,  (It really does look like a book when closed!)

Sharon has used patterned papers, a die-cut robin and a border sticker to decorate the front of the card, and simply drawn pages using a pencil and ruler to suggest pages on the inside.

Its as nice quick card to make but very effective!!

Friday 20 November 2015

SIMPLE SYMPATHY CARD

SIMPLE SYMPATHY CARD
Sympathy cards are often made at a difficult time and a simple approach can be useful.

In this case, I've dabbed some distress inks onto an acrylic stamping block, lightly spritzed it with water, then put the card face down on the block and gently run over the surface so the colours transfer to the card and merge together.  (Any water-based ink will do, just make sure you use colours that aren't on opposite sides of the colour wheel unless you want a grey/brown effect).

You can either wait until the ink has dried or use a craft heat gun to speed up the process.

Choose a narrow high stamp and stamp it with black ink in the corner.

Write the message at the bottom, then hand-draw a frame.  If you mess up a corner (as I did) just make it into a feature!!

I think sometimes we are so focussed on getting the right stamp or die that we forget that we can always just write the greeting ourselves!  I also know that just about everyone (myself included)  had issues about their handwriting, but bear in mind that it is one way to ensure that you have made a truly unique and personal card.

Wednesday 18 November 2015

QUICK CARDS FOR CHRISTMAS

TWO QUICK CHRISTMAS CARDS
This is about the time of year, that a little alarm bell starts ringing in the back of the brain if you have decided to send handmade Christmas Cards this year but haven't actually managed to make a start yet.

Here are a couple of speedy solutions, so you can grab some materials, and be feeling smug by the weekend!  Both cards have used bases from Regal Craft Cards.

The first adds green and gold matting (with a hand-drawn border), and two cut out trees (also available from Regal.  The simplest things can sometimes set a card apart from the ordinary, and in this case its simply the removal of one of the top corners.

The second card can be purchased with the three trees and slotted border already cut out, so all that needs to be done is to add decorative papers behind the apertures and its done!!

These are almost "5 minute wonders" but I'd say 10 - 15 minutes tops - less if you are well organised and set up a little "production line."

Friday 13 November 2015

STEPPER BABY CARD

STEPPER BABY CARD
Another really cute card from Trudy this week.

Regal make these stepper cards, which come with envelopes, so all that you need to do is add the decoration.

In this case, Trudy has covered the front with patterned paper, stamped and coloured images on the sides, and added a sparklelight 3D picture (also available from Regal) as a feature in the middle.

Baby cards are often kept for a long time, so its worth making that little bit of extra effort

Wednesday 11 November 2015

CHEERFUL OWL CHRISTMAS CARD

CHEERY OWL CARD
Tania has made a simple but effective Christmas card using a plain singlefold white card from Regal Craft Cards as her base.

She has added red card, then embossed green, more red and then smooth white, to frame the Christmas wish (a peel off sticker).

The card is further embellished with punched snowflakes (actually a sunburst punch) and die a diecut scalloped corner.  The glitter card is fairly thick, so do use caution and avoid small punches if you want to punch shapes from it.  Die-cutting should pose no problems.

Lastly but perhaps most importantly, Tania has finished her card by adding a cute Christmas owl button.

Friday 6 November 2015

SIDE STEPPER BEACH THEMED CARD

"AT THE BEACH" STEPPER CARD
We have another of Trudy Meijer's cute cards from a demo she did for Regal Craft Cards a while ago.

This is a true collage card, incorporating everything from pebbles and shells to nets.

The base card is ST1 - Regal's side-stepper card, which is already cut and creased so that you can go quickly to the "fun" bit of decorating without all the measuring, scoring and cutting.

Trudy has applied glue to the front and covered it in real sand for her background.  She's added some stamped features and a LaLaLand stamp, coloured with Kaiser fusion pens and fussy cut.  On the back panel, is some patterned vellum, (made by embossing) attached with white split pins, with layers of paper underneath to be the sea.

Doesn't it look cute?

Wednesday 4 November 2015

CHRISTMAS CARD FEATURING AUSTRALIANA PAPERS

Australian Parrots Christmas Card
How simple is this card thanks to the lovely paper from Ultimate Crafts, and a Regal square card base  Just mat the paper on a bit of red, add a Sparklelight sticker (available from Regal Craft Cards), and a feather (in this case from my backyard) and you're done!

At this time of year you don't necessarily want to be spending hours on your cards, especially if you're sending them overseas, and there are a lot of pretty papers around that can be used in a similar way.
Inside View

Friday 30 October 2015

CALENDAR STEPPER CARD

CALENDAR CARD - EGYPTIAN
If you're going to make a special card for someone, it's nice to think that it might have a life beyond a couple of days on show on the sideboard.  If you include one of Regal's little calendars on one of their pre-cut and scored stepper cards, the chances of a long-life on display are greatly increased.

I've just added some blue and gold paper and border stickers to the card which features an Egyption-themed  Sparklelight 3D, once again from Regal Craft Cards!

The best part of all is that its really easy to make but looks quite impressive!!

Friday 23 October 2015

STEAMPUNK INSIPIRED

A card with moving parts
I've used a plain white DL singlefold card from Regal Craft Cards as the base for this steampunk-inspired card.

The front has been covered with bronze shimmer paper, and then copper card, embossed with a Couture creations folder featuring hot air balloons and cogs.

The clock has been cut with a Kaiser die, and glued to a bronze circle.  The space between two of the numbers has been cut.
a strip of acetate has been attached underneath the bronze card and some die-cut cogs stuck to the end of it.  Clock hands have been die-cut from gold and glued on.

The whole assembly was then attached to a slightly larger circle of gold card (with a small circle between the layers to act as a washer) with a split pin.  (Its easier to pierce a small hole first).  An additional cog has been added to the centre of the clock, and a couple of pictures cut from Kaiser paper and a couple of stickers were added as further embellishment.  Its important to check that the clock will rotate freely before attaching it to the front of the card.

If you want, add some pictures or stickers under the revolving window.  In this example, I've made a "countdown" using little number stickers with a couple of starts and exclamation marks at the end.

This card could be used for birthdays, father's day or even for New Year.

Wednesday 21 October 2015

SILVER CHRISTMAS TREE CARD

Horizontal fold Robin Red Xmas Tree Card
This another of the Robin Red cards released as a Christmas Special from Regal Craft Cards - the horizontal fold (in this case being used with the fold at the top).

Tania has added a silver diecut tree (also from Regal) which as been embossed.  Rhinestones have been added as decoration and stickers make up the remainder of the embellishment on layers of paper and card.

This is a fairly simple card, but very effective.  If you have a lot of Christmas cards to make, this could be the design you need!

Friday 16 October 2015

SHABBY CHIC

SHABBY CHIC
Clearly this card is a bit of "too much is not enough", but I made this card for a recent demo to illustrate some of the things that characterize Shabby Chic style.

I started with square white Regal base card (the easy bit) then added lots more white - the flower the doiley, the flourishes (all fairly typical of the style), but also to my papers.

The background was a vibrant flamingo pink before I calmed it down with a thin coat of gesso.  Similarly the top pink panel began life as a normal pink before I painted over it with some white paint, embossed it (when it was dry) and then sanded the top layer back to reveal the darker colour beneath.

Add in various die cut bits and pieces, a greeting sticker, some pearls and some stamped bird cages and hopefully you'll be getting the shabby chic idea.........not that you have to (or indeed should) use ALL of these ideas on one card!!

Wednesday 14 October 2015

ROBIN RED CHRISTMAS SWING CARD

ROBIN RED SWING CARD FOR CHRISMAS
BACK
FRONT
This Robin Red swing card base comes from Regal Craft Cards and is one of their special selection of Christmas cards released this year.  Its all cut and folded and ready to go so all you need to do is to go straight to the fun bit and add some decoration!!
Tania has used stickers, embossed papers and die-cut circles to decorate her card.

Friday 9 October 2015

COLLAGE STAMPED THREE SQUARE CARD

COLLAGE STAMPED  CARD - Front View


COLLAGE STAMPED  CARD - middle
Collage stamping is a way to add the impression of dimension without adding bulk to your cards.  Anna Wilson has made an interesting example which illustrates many of the techniques that can be used.

The card base is a lime green 3 square card from Regal Craft Cards.  The panel behind the squares has been inked and stamped multiple times, ink has been spattered on the front, and the little squares have been decorated with stamps, stamped onto an inked background, and mounted on scallop edged orange backgrounds.

Inside the card, Anna has masked an area (probably using a post-it note?) and then spattered over the top which effectively highlights the greeting.  She's added a stamp to the bottom of this area, and popped on a fussy cut multi-stamped bird in a cage to highlight the opposite page.

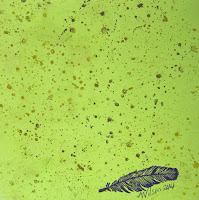
Its easy to forget the back of the card, but do remember that even with a single fold card you have four possible panels to decorate so why just stop at the front?  Anna has spattered the back with a variety of inks and finished the card with a stamped feather and her signature!  Signing your work is a great thing to do - its a lovely personal touch.

Wednesday 7 October 2015

QUICK CARD USING THREE SQUARE BASE

Quick Christmas CArd
If you want to make a really quick card but one that still has great impact, the choice of card base is very important.
This licorice black 3 square card from Regal is the ideal example.  All you need to do is to add something nice underneath (I've chosen Fairway shimmer paper but you could chose a patterned paper or even fabric).  After that stick on a couple of stickers, (these are sparklelight from Regal), and you're done!

Friday 2 October 2015

FUN FISH CARD

FISH STEPPER CARD
This card illustrates just how effective the clever use of a single piece of paper can be.  Trudy has used a Regal stepper card base, and covered the front with blue paper.  She has added a piece of patterned paper to the back panel.  Next, she has  fussy cut individual pieces from the paper, and stuck them on with dimensional tape, matching them to the same pattern underneath, for a 3D effect.

The finished card would be great for anyone who likes bright colours, young or old, male or female!

Wednesday 30 September 2015

SINGLE FOLD ROBIN RED CHRISTMAS CARD

ROBIN RED SINGLE FOLD CARD
Kaiser puts out their papers and accessories in co ordinated releases so you can be sure that all the elements in the same set will match.

Tania has used three pieces of paper to decorate this single fold card - another of Regal's Christmas Robin Red series, (these are not in their catalogue but you can get them in the shop or ask for them to be posted).

Apart from the adhesive pearls this card is all about the paper, and its a great example of ways in which all those little scraps can be used.....or alternatively how you can produce a number of Christmas cards in a fairly quick time frame, if like me, you tend to be a bit prone to last minute efforts!!

Friday 25 September 2015

3D CARD WITH Z FOLD FRONT

Z FOLD CARD
This is a different way to use your square base cards, and its super simple!  Just fold the front panel in half (make a valley fold) then stick a shape (in this case an oval but a heart or star or any other shape will work) half onto the fold, so that when the card sits up, a 3D effect is achieved.  (See the "top view" below.

In this case I've used a textured white square card base from Regal Craft Cards, and decorated it with a 3D sparklelight picture, stuck to an oval backing.

A heart cut-out and stamped red strip decorate the back panel.  You could use this card for mother's day, valentines a birthday, or even a wedding or anniversary (perhaps replace the red with a patterned white on white).
TOP VIEW

Wednesday 23 September 2015

CHRISTMAS GATEFOLD CARD

Gatefold with 3D
Here is another one of Regal's special robin red Christmas Cards - this time a gate fold.

Tania has turned the front panels into "doors" with layered paper panels, corner stickers and with split pins with "handles."

Inside the card is a Sparklelight nativity scene - its off a 3D sheet (available from Regal) but with just a few of the layers used to add a bit of dimension but to enable the card to be closed relatively flat for posting as well.

Blue is not a traditional Christmas colour, but you can see that quite clearly this card is very much "of the season". Tania has used the colours of the feature picture to guide her use of colours for the rest of the card.

Friday 18 September 2015

RIBBON WRAP DRESS CARD

RIBBON WRAP DRESS CARD
This is such a simple idea, and as with the best of them I hadn't thought of doing it before I saw Marilyn's card.  She had cut out the shape of a dress, and carefully wrapped it with blue ribbon, adding a sparkly blue ribbon "belt" to finish.

The finished dress has been mounted onto a white singlefold card from Regal Craft Cards.

I can't wait to start wrapping other shapes.....if you do Halloween, a mummy would be an obvious choice, but trees would be effective (maybe even wrapped in twine for a natural look) or maybe actually wrap present shapes for your
Christmas cards.  The possibilities are endless!

Tuesday 15 September 2015

CHRISTMAS STEPPER CARD

CHRISTMAS STEPPER CARD
Yes....it is getting to that time of year.  It's really not too early to get started on Christmas cards so (if I'm able) I'll try to put up a special post between now and the day each Wednesday for folks that are looking for a bit of inspiration.

Regal has made 5 special Robin Red Cards with Christmas in mind - stepper, gatefold, singlefold, horizontal fold and swing cards.

Tania has done a great job with the new red stepper card, decorating it with patterned and patterned paper (inked on the edges), and some die-cuts and paper flowers.
The "Merry Christmas" greeting is an outline sticker coloured with alcohol markers to match in with the red, green and white colour scheme.

Friday 11 September 2015

CUTE STEPPER CARD

CUTE STEPPER CARD
We have another of Trudy Meijer's creations for you this week.  This would make a lovely card for a little girl's birthday.

Trudy has used one of Regal's stepper card bases, and decorated it with a variety of papers and embellishments, including fussy-cut shapes, ric-rac and stickers.  Notice the cute little La-La Land Marci stamp which Trudy has coloured using alcohol markers, and the big white organza bow that adds that special finishing touch.

Even although this card looks quite complicated, everything is tied together with careful colour choice (pinks, lime green and white), and the use of the pre-made base.  Have a rummage in your craft box and see what you can find!

Friday 4 September 2015

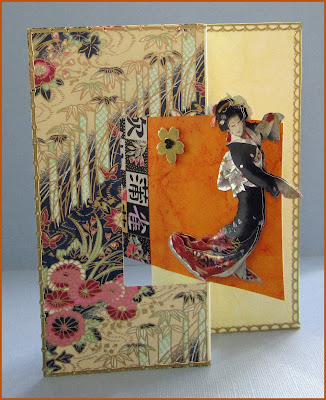
A SWING CARD FEATURING 3D JAPANESE LADIES

SWING CARD WITH JAPANESE LADIES
Here is an example of Regal's new (ish) swing card.
These cards are great when they're finished but quite hard to cut so its handy to know that you can now buy them with all the tricky bits done so you can get straight onto the fun bit of decorating them.

Trudy Meijer made this example, using some lovely Japanese papers, and Japanese ladies from a die-cut sparklelight sheet.  She has positioned the figures so that there is one on each side of the swinging panel.
REVERSE

Friday 28 August 2015

USING A VELLUM OVERLAY

SCORED VELLUM
If you want to add a different look to an existing card, try adding a translucent overlay.
This paper (known as parchment paper or vellum, although strictly speaking it's neither of these) is available from the Regal Craft Cards website, and is useful for all sorts of things.

Most commonly used for parchment craft/"Pergamano" one of its properties is that when it stretches it goes white, which means that its great for embossing, either in a Cuttlebut/Big Shot etc., or by hand, or, as I've done here to add detail, just by using a stylus and scoring board to add some lines.

I've used thick parchment paper (its available in four thicknesses) with a paper insert (decorated with a Sparklelight sticker), but you could wrap a thinner parchment "coat" around an existing card or just attach it with split pins to the front!

Friday 21 August 2015

BOX ZIGZAG BON VOYAGE

INSIDE TRUDY'S TRAVEL-THEMED CARD
Travel Card - cover
Trudy used a box zigzag card from Regal Craft Cards to make this great collage card - brilliant as a Bon Voyage greeting, a birthday card for a teenager or keen photographer or really just for anyone who appreciates a well-made card.  It features a die-cut butterfly, bird and kangaroo, as well as a selection of different papers and more.  If you like a well-decorated card, the box zigzag gives you plenty of surface area to play with, and Trudy's example will hopefully provide the inspiration to get started!

Friday 14 August 2015

SPARKLELIGHT ART DECO LADY 3D

ART DECO LADY CARD
Another pretty card from Marilyn this week, featuring a sparklelight 3D Art Deco lady motif.

Marilyn has added specialty papers and some lovely floaty gold organza ripple ribbon to a DL card from Regal Craft Cards to make a card suitable for a special birthday.  Note how she has fussy cut "shells" from the embossed background paper to use as embellishment.

Wednesday 12 August 2015

Just a quick note to let you know that double sided adhesive "Jac paper" is back in stock once more at Regal Craft Cards.  They have the big sheets, A4 and packs of A6 too!  Just writing this down makes me want to do "101 uses for Jac Paper" for a demo or on the Papertrek blog.....in fact as soon as the September demo (Stylish Cards) is done and dusted I'll get right on with it.  In the meantime if you use Jac paper already, you'll be as pleased as me that its available again, and if you don't, pop into the shop and I can give you a quick rundown of why its so very useful!

Friday 7 August 2015

TEALIGHT CARD.

TEALIGHT CARD
Continuing on with last weeks theme........Here is another way to fold an aperture card that might come in handy for all sorts of occasions.

Secure some vellum behind the aperture - I've used some pretty patterned Christina Re paper but you could use plain, or draw your own design or print out a photo or clip art!  Its important for a fair amount of light to get through, so use a fairly thin paper and don't add too much heavy colour.

Measure and fold half way along on the side panels. Measure the piece of card you'll need to fit the back (paper clip card in place, move the card to how you would like it to sit, then mark with a pencil to show where to cut).
You might want to use a metallic or gloss card to reflect more light.  (I used shiny silver).  Then add some decoration - I've kept it very low key with just three ribbon roses, but clearly you could add as much in the way of embellishment as you like.  All that's left to do is to add a battery powered tealight candle.  I WOULD NOT ADD ONE THAT INVOLVED FIRE - IT IS AFTER ALL MADE OF PAPER!!!!!!!!

You don't, of course, have to use an oval card - Regal Craft Cards have lots of different shapes available (everything from rectangles to dolphins!) or you can get blank three panel cards and use your dies to cut whatever shape you want.

I think this would not only be useful just as a card, but also as a placecard or decoration.  I have plans (whether or not they'll translate to reality is a different matter) to print out some photos and make some to put on the dresser for Christmas

Friday 31 July 2015

A NEW WAY TO FOLD AN APERTURE CARD

OPEN REVERSE OVAL CARD

CLOSED CARD
This week I've put up a couple of pictures of a way to use an oval aperture card, that's a little different to the norm.

The folding is easy - just add an extra fold to the middle of each of the outer panels, and fold them back in a zigzag .  The "front" of the card becomes the back and the folded side panels are now the front.!

I've used a 3D Sparklelight sheet (Regal Craft Cards have a good variety available) but instead of building all the pieces onto the base picture, I've put the base behind the oval aperture, and distributed the other pieces over the two front panels.

I've added an embossed red panel to the back of the card (you can't see it in the picture) and secured some red organza ribbon underneath so it can wrap around and securely close the card.  I've also added embossed red card to the inner halves of the folded front panels.

If you've got some half-forgotten aperture cards hiding in a drawer at home, why not get them out and play.  If not, you can always buy some from Regal Craft Cards.

Friday 24 July 2015

SPARKLELIGHT WATERFALL CARD

SPARKLELIGHT WATERFALL CARD
 This is a waterfall card I made, using a die-cut Sparklelight sheet and a Sparklelight base card - both products available from Regal Craft Cards.
Waterfall cards are made of panels that flip over when you pull the end tab, and are far easier to make that they look.

The instructions come in the pack, but I modified them a bit, by mounting the pictures on some black lightweight card to add extra stability, and also by positioning the "waterfall" run across the card, rather than the more usual vertical orientation.  If I was making the card again, I would put the pull on the other side, as we're all so used to the way that book pages open, this doesn't quite look quite right, even although there is clearly no absolute right and wrong.

Other than that, I haven't really had to add much more other than a bit of "bling trim" (from Green Tara via Regal).

This would make a nice engagement card, but would do for all sorts of occasions.

Friday 17 July 2015

AN ELEGANT CARD FOR SPECIAL OCCASIONS

ELEGANT SPECIAL OCCASION CARD
This lovely layered card could be used for all sorts of occasions, but engagements and weddings spring immediately to mind.

Marilyn has used a collection of layered materials to decorate the front of the card, creating a variety of textures and patterns which are tied together by the use of the black, white and silver colour scheme.

Working left to right there is printed organza ribbon, cotton mesh, black satin adhesive leaves, specialty paper, white organza ribbon with silver glitter hearts, and a congratulations peel-off sticker, coloured black.  Two paper flowers with rhinestones added to the centre have been added as a final finishing touch.
(All materials including the smooth square base card came from Regal Craft Cards).