Friday 30 October 2015

CALENDAR STEPPER CARD

CALENDAR CARD - EGYPTIAN
If you're going to make a special card for someone, it's nice to think that it might have a life beyond a couple of days on show on the sideboard.  If you include one of Regal's little calendars on one of their pre-cut and scored stepper cards, the chances of a long-life on display are greatly increased.

I've just added some blue and gold paper and border stickers to the card which features an Egyption-themed  Sparklelight 3D, once again from Regal Craft Cards!

The best part of all is that its really easy to make but looks quite impressive!!

Friday 23 October 2015

STEAMPUNK INSIPIRED

A card with moving parts
I've used a plain white DL singlefold card from Regal Craft Cards as the base for this steampunk-inspired card.

The front has been covered with bronze shimmer paper, and then copper card, embossed with a Couture creations folder featuring hot air balloons and cogs.

The clock has been cut with a Kaiser die, and glued to a bronze circle.  The space between two of the numbers has been cut.
a strip of acetate has been attached underneath the bronze card and some die-cut cogs stuck to the end of it.  Clock hands have been die-cut from gold and glued on.

The whole assembly was then attached to a slightly larger circle of gold card (with a small circle between the layers to act as a washer) with a split pin.  (Its easier to pierce a small hole first).  An additional cog has been added to the centre of the clock, and a couple of pictures cut from Kaiser paper and a couple of stickers were added as further embellishment.  Its important to check that the clock will rotate freely before attaching it to the front of the card.

If you want, add some pictures or stickers under the revolving window.  In this example, I've made a "countdown" using little number stickers with a couple of starts and exclamation marks at the end.

This card could be used for birthdays, father's day or even for New Year.

Wednesday 21 October 2015

SILVER CHRISTMAS TREE CARD

Horizontal fold Robin Red Xmas Tree Card
This another of the Robin Red cards released as a Christmas Special from Regal Craft Cards - the horizontal fold (in this case being used with the fold at the top).

Tania has added a silver diecut tree (also from Regal) which as been embossed.  Rhinestones have been added as decoration and stickers make up the remainder of the embellishment on layers of paper and card.

This is a fairly simple card, but very effective.  If you have a lot of Christmas cards to make, this could be the design you need!

Friday 16 October 2015

SHABBY CHIC

SHABBY CHIC
Clearly this card is a bit of "too much is not enough", but I made this card for a recent demo to illustrate some of the things that characterize Shabby Chic style.

I started with square white Regal base card (the easy bit) then added lots more white - the flower the doiley, the flourishes (all fairly typical of the style), but also to my papers.

The background was a vibrant flamingo pink before I calmed it down with a thin coat of gesso.  Similarly the top pink panel began life as a normal pink before I painted over it with some white paint, embossed it (when it was dry) and then sanded the top layer back to reveal the darker colour beneath.

Add in various die cut bits and pieces, a greeting sticker, some pearls and some stamped bird cages and hopefully you'll be getting the shabby chic idea.........not that you have to (or indeed should) use ALL of these ideas on one card!!

Wednesday 14 October 2015

ROBIN RED CHRISTMAS SWING CARD

ROBIN RED SWING CARD FOR CHRISMAS
BACK
FRONT
This Robin Red swing card base comes from Regal Craft Cards and is one of their special selection of Christmas cards released this year.  Its all cut and folded and ready to go so all you need to do is to go straight to the fun bit and add some decoration!!
Tania has used stickers, embossed papers and die-cut circles to decorate her card.

Friday 9 October 2015

COLLAGE STAMPED THREE SQUARE CARD

COLLAGE STAMPED  CARD - Front View


COLLAGE STAMPED  CARD - middle
Collage stamping is a way to add the impression of dimension without adding bulk to your cards.  Anna Wilson has made an interesting example which illustrates many of the techniques that can be used.

The card base is a lime green 3 square card from Regal Craft Cards.  The panel behind the squares has been inked and stamped multiple times, ink has been spattered on the front, and the little squares have been decorated with stamps, stamped onto an inked background, and mounted on scallop edged orange backgrounds.

Inside the card, Anna has masked an area (probably using a post-it note?) and then spattered over the top which effectively highlights the greeting.  She's added a stamp to the bottom of this area, and popped on a fussy cut multi-stamped bird in a cage to highlight the opposite page.

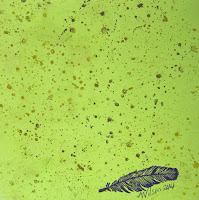
Its easy to forget the back of the card, but do remember that even with a single fold card you have four possible panels to decorate so why just stop at the front?  Anna has spattered the back with a variety of inks and finished the card with a stamped feather and her signature!  Signing your work is a great thing to do - its a lovely personal touch.

Wednesday 7 October 2015

QUICK CARD USING THREE SQUARE BASE

Quick Christmas CArd
If you want to make a really quick card but one that still has great impact, the choice of card base is very important.
This licorice black 3 square card from Regal is the ideal example.  All you need to do is to add something nice underneath (I've chosen Fairway shimmer paper but you could chose a patterned paper or even fabric).  After that stick on a couple of stickers, (these are sparklelight from Regal), and you're done!

Friday 2 October 2015

FUN FISH CARD

FISH STEPPER CARD
This card illustrates just how effective the clever use of a single piece of paper can be.  Trudy has used a Regal stepper card base, and covered the front with blue paper.  She has added a piece of patterned paper to the back panel.  Next, she has  fussy cut individual pieces from the paper, and stuck them on with dimensional tape, matching them to the same pattern underneath, for a 3D effect.

The finished card would be great for anyone who likes bright colours, young or old, male or female!