.jpg)
In case you missed my last post and were wondering, the shop is re opening on Wednesday 02 January.
 |
| LAST MINUTE CHRISTMAS CARDS |


 |
| CARDS FOR A VERY HAPPY CHRISTMAS |
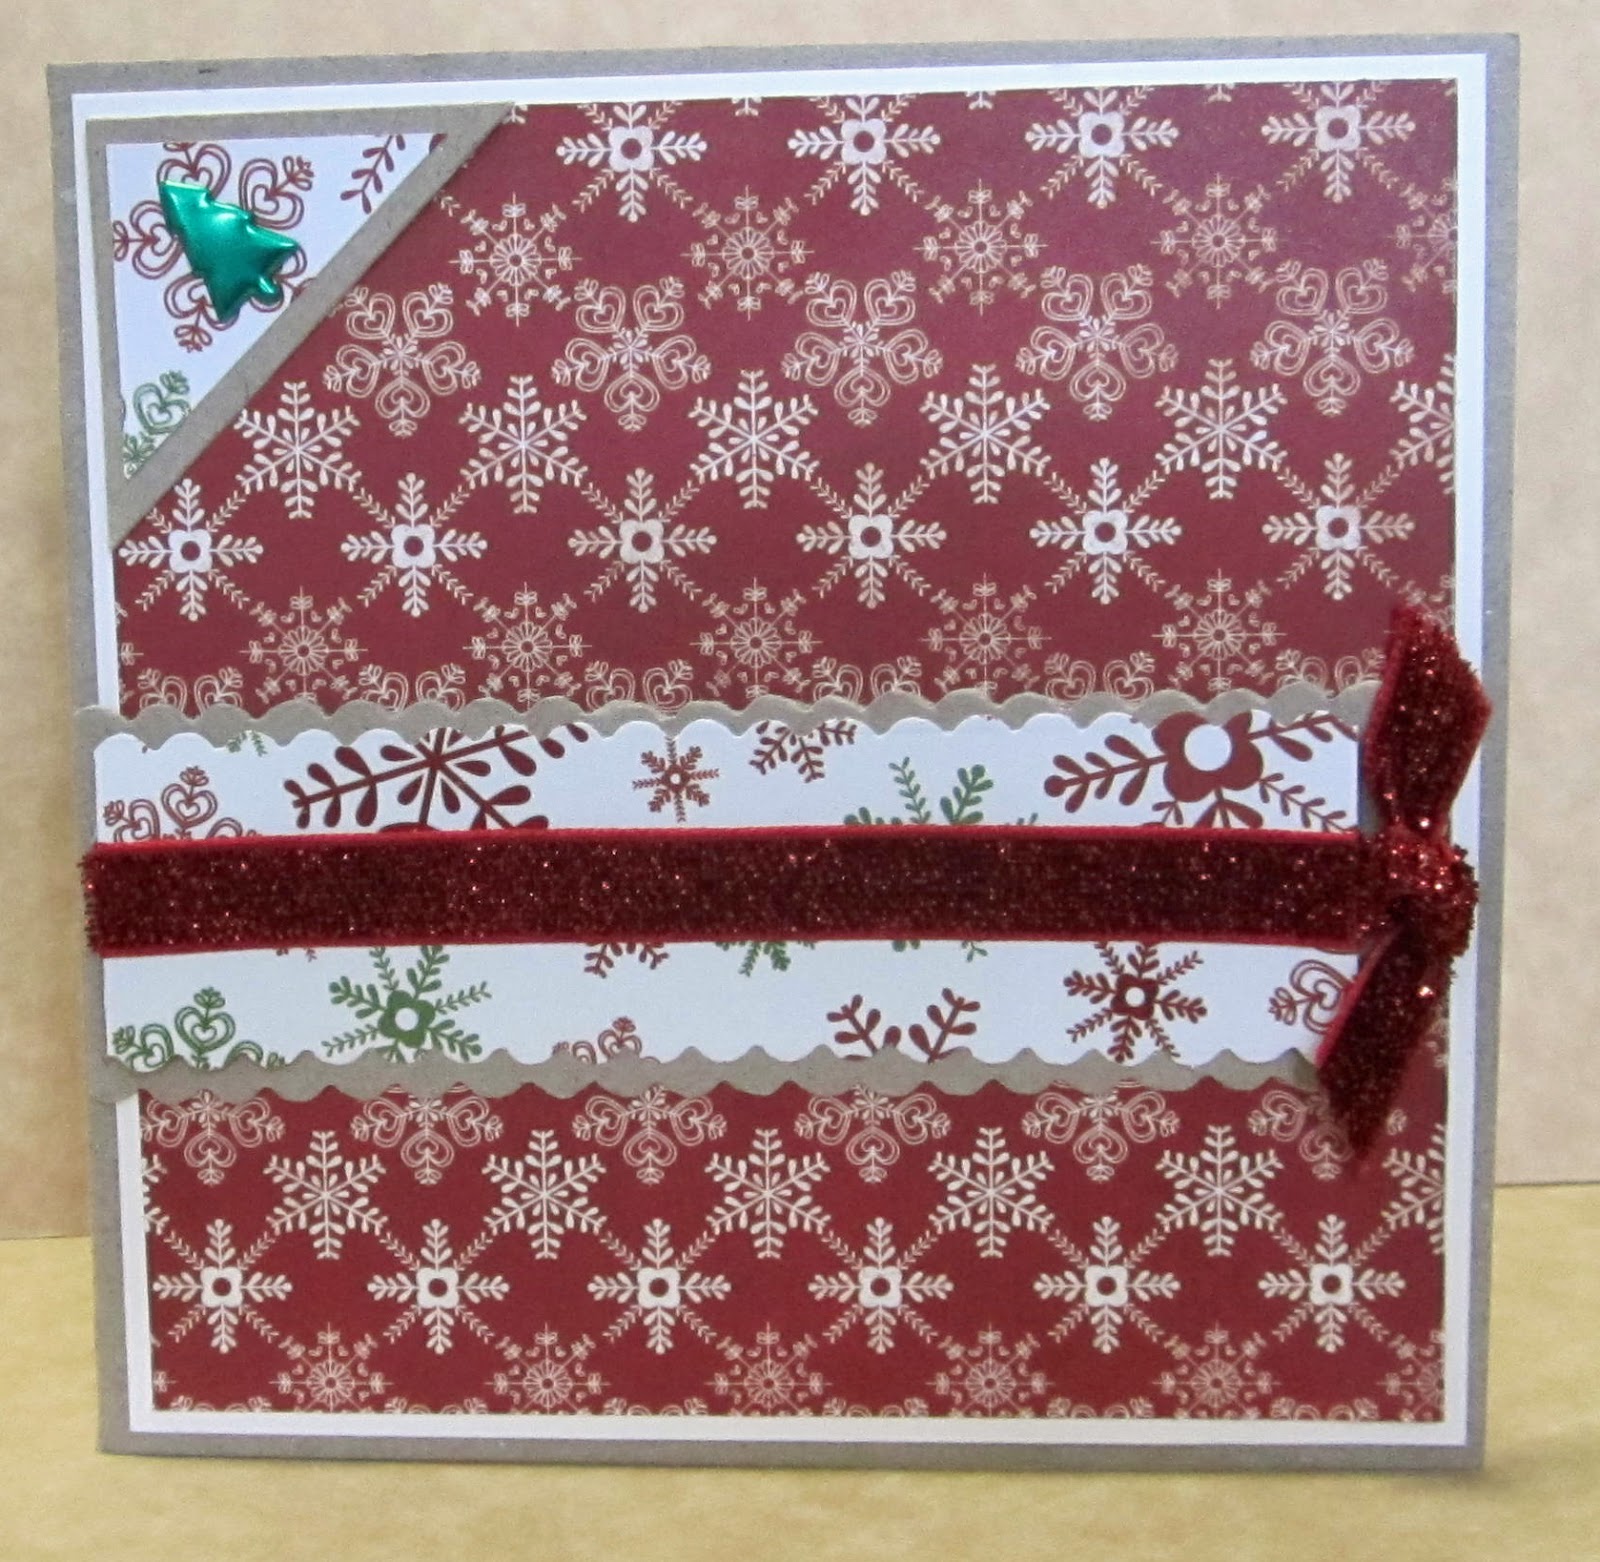 |
| QUICK CHRISTMAS CARD |


 |
| CHRISTMAS TEA CUP |


 Leith Laws made this lovely butterfly card. She used a Regal smooth white singlefold card as a base and then added a circle of butterflies cut from Kaiser paper with a Martha Stewart punch. A rub-on from Kaiser completes the design. Leith is another of our lovely customers who have agreed to share some of their work, so there will be some more cards from her in the coming weeks


 Janet has made this pretty card using a variety of flowers and a Sparklelight backing sheet. Sparklelight is delicately etched and it reflect lights adding a sense of movement. Unfortunately it makes photography difficult, so you'll have to believe me when I say that even although this card looks nice on the screen, its even more beautiful in reality.
 Zoe made this lovely Koala Card. She used a Regal Singlefold smooth white card as a base, and added a background of green swiss dots and brown Bazzill card. The cute koala is a Stamp-It stamp that Zoe has stamped out twice and coloured. She's then cut a section from one of the images and mounted it on top of the other using some double-sided foam tape to add some height. The greeting is an outline sticker, and the finishing touches were added with a piece of real bark for the tree branch and an actual leaf on top of the greeting.


| CHRISTMAS TREE CARD |

 This card is the very newest release from Regal......and I mean VERY new, it only came down to the shop late yesterday. Tania and I did have a little time beforehand to play........and these are the results. The cards hinge at the top, and are made from smooth white cardstock so they are easy to colour or stamp if you don't want to cover them with decorative papers. We'll try and get a few more examples done in the coming weeks.
 I just love Graphic 45 papers and the one I've used for this card is from their Little Darlings range. I've used one of Regal's pretty blue singlefold cards as the base, and added some punched daisies with Kaiser pearl centres. The blue panel at the bottom is edged with a Martha Stewart border punch and more pearls!
.jpg)
Tanias.jpg) The three-square is one of Regal's more unusual cards. It also has three panels. The middle panel has the three joined squares already cut out so that you can put paper or fabric or anything flat (E.g. cork, metal, acetate etc) underneath. The front panel can then be secured behind the feature panel to hide messy backs E.g. split pins, sewing, staples etc). Tania has used some Botany (a natural-coloured recycled paper) to make a torn border and backing for the squares. She's then put some Graphic 45 paper behind and on top of the squares, adding a corner to the bottom edge, and finally popped on some tiny black stickers for a finishing touch.
The three-square is one of Regal's more unusual cards. It also has three panels. The middle panel has the three joined squares already cut out so that you can put paper or fabric or anything flat (E.g. cork, metal, acetate etc) underneath. The front panel can then be secured behind the feature panel to hide messy backs E.g. split pins, sewing, staples etc). Tania has used some Botany (a natural-coloured recycled paper) to make a torn border and backing for the squares. She's then put some Graphic 45 paper behind and on top of the squares, adding a corner to the bottom edge, and finally popped on some tiny black stickers for a finishing touch.