Friday, 27 May 2016

KAISER PAD CARD FOR DAD

A QUICK CARD FOR DAD
Just a quick little card using "leftovers" from the 6.5" KAIser pad from the "On the Farm" collection.  As these pads come with greetings, labels, shapes and suchlike, could make a similar layout from most of them.

I've used a Regal base card, but cut the front panel a little shorter to reveal the second paper inside the card, and mounted the label, greeting and arrow on red to separate them from the background (they matched in a bit too well before).  A couple of starry split pins, a bit of brown ink around the edges and a piece of twine later it's done.

The position of the arrow draws attention to the greeting (the horses on the label are "looking at it" too), which is positioned about a third of the way down and about two thirds of the way across the front of the card for added impact.

Its not quite a 5 minute card but close!

Friday, 20 May 2016

TEXTURE PASTE TASSIE

TASMANIA WITH TEXTURE PASTE
I used a couple of products from Regal Craft Cards to make this card which would be good for a Bon Voyage greeting.  The first was one of their square singlefold textured white cards, and the other was their Tasmania cut-out, which I used as a stencil.

I applied a thick coat of modelling paste through the cut out, and used a butter knife (I do own little palette knives but they were at home in the drawer) to add texture.   I could have used some acrylic paints to add colour but liked the simple blue and white effect.

The greeting is from the Ultimate Crafts Australiana pad, and has been coloured with Tombow pens.

Friday, 13 May 2016

TASSIE DEVIL EASEL CARD

TASSIE DEVIL CONGRATULATIONS
An often overlooked source of card toppers are postcards!  This fearsome fellow is from Tas Postcards and Souvenirs.

An extra fold has made one of Regal's 3 panel square cards into an easel so that he sits up on display.  The circle that keeps him upright is made from paper clay using a combination of techniques - first it was made light green by colouring with a green marker onto a little white ball of clay and then mixing it through by kneading.  I rolled the clay out, pressed it onto an embossing folder and left to dry, the die cut into a circle and brushed over with a black ink pad.  It sounds complicated but if you work step by step its easy!

The card just squeezes through as standard thickness and as paper clay (Magic clay) is very light, doesn't weigh too much so you could send this as a special greeting from Tasmania, although I think that a pre-schooler might like it for their birthday too! I've added a "Congratulations" peel off sticker, honestly just because it was in the cupboard......you could add your own greeting with either a sticker, a computer print-out, stamp or die-cut to suit the occasion.

One of the nicest things about working in a craft shop is that you meet the loveliest people - some of whom we see each week, and come to regard as friends.


Friday, 6 May 2016

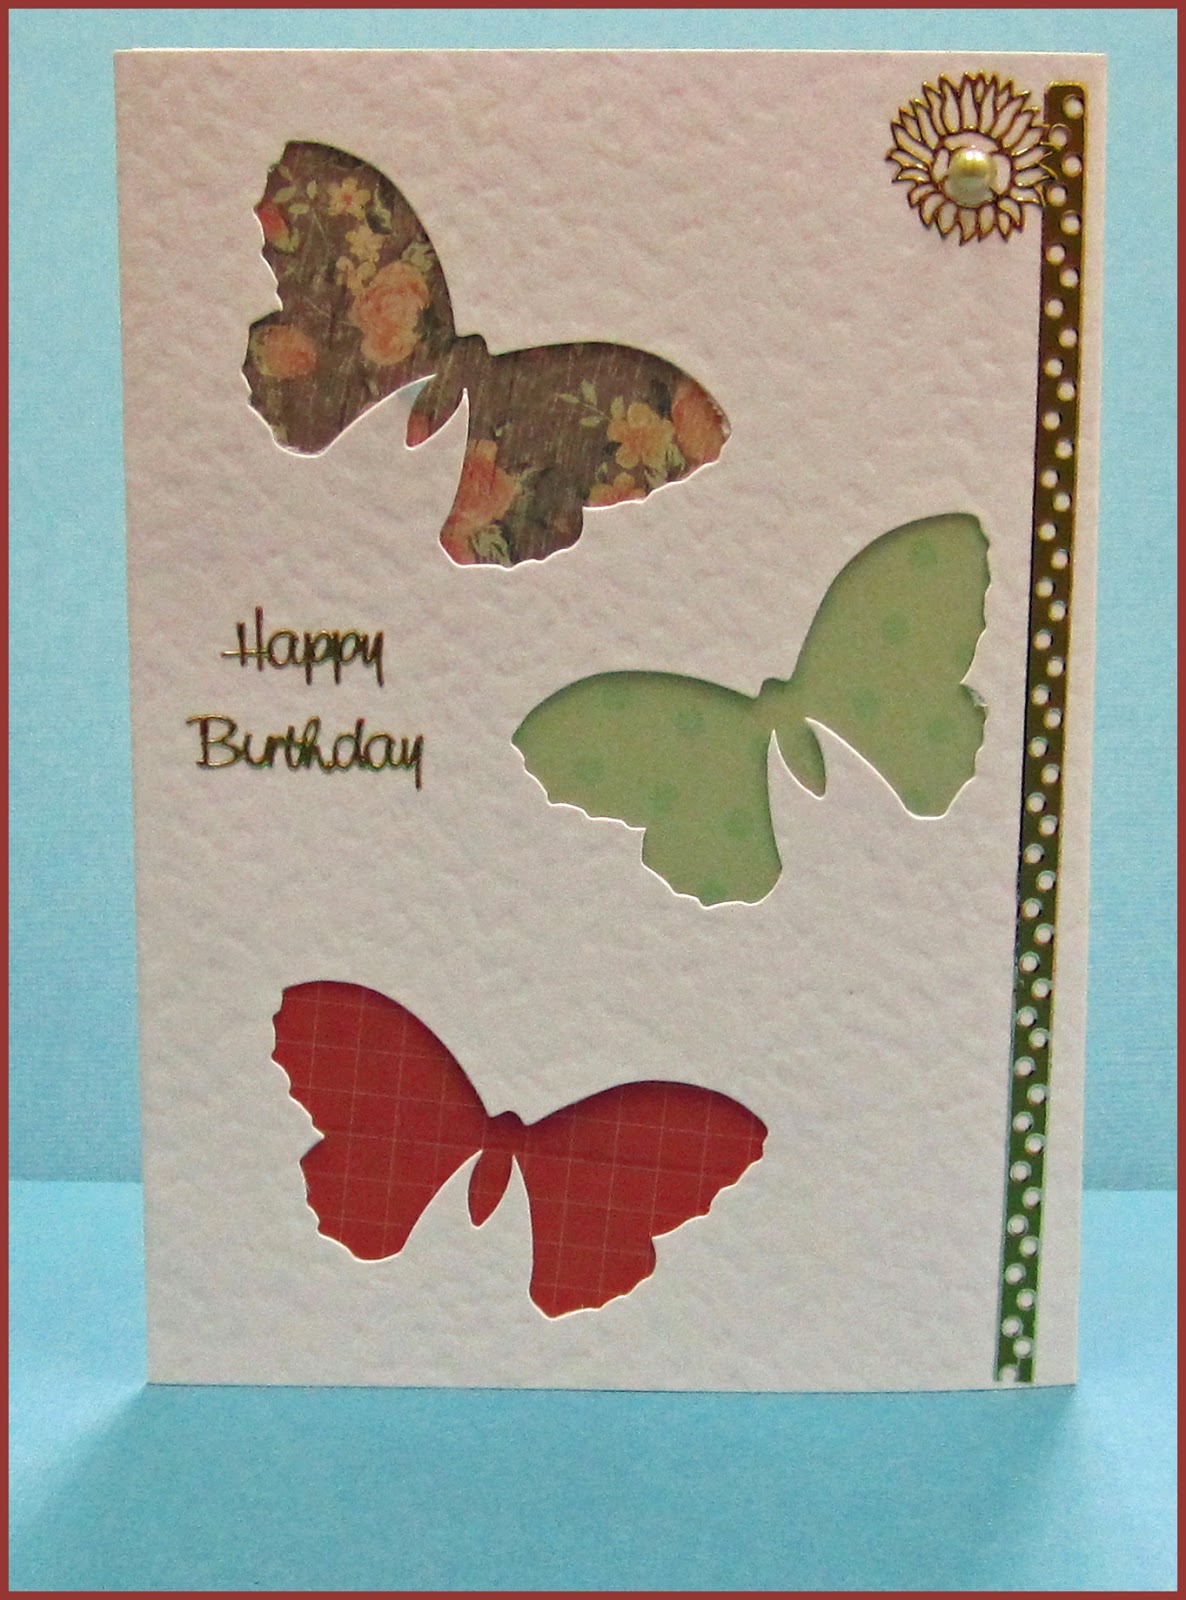
3 BUTTERFLY CUT OUT CARD

QUICK BUTTERFLY CARD
If you have the right base card like this one from Regal Craft Cards you can make a handmade card in record time.

Sharon has added a selection of pretty papers to Regal's white textured 3 butterfly card (NO58 or XNO58). (You don't even need to cut neatly as the card's third panel folds underneath to hide the back). A couple of stickers and an adhesive pearl later and your work is done!

This is a really nice way to use up left-overs or to showcase really special papers.

Friday, 29 April 2016

PAPER CLAY SHELL CARD

BEACH-THEMED CARD
Paper Clay (Magic Clay) is a great material for cards as you can make some quite substantial embellishments without adding excess weight.

In this example I've used some paper from the Ultimate Crafts Australiana collection and added some shells made by stamping some inked Darkroom Door stamps into paper clay that has been rolled flat.  I cut around the images for this card whilst the clay was still wet, but have done a bit of experimenting since then and find that its probably easier to stamp then allow the clay to air dry and simply cut out the images with scissors!

I'v left the space under "Post Card" which you could also do, but if you wanted to add additional words or a greeting there is plenty of room to do so here.

Friday, 22 April 2016

"NOSTALGIC CHILDHOOD" STEPPER CAR

STEPPER CARD FOR BIRTHDAY OR MOTHER'S DAY
Unfortunately neither Sparklelight nor 3D pictures photograph easily, and I really haven't done justice to Sharon's card.

The picture sheet is called "Nostalgic Childhood (SLDC 48574) and is from Regal Craft Cards, as is the white smooth step base card (XST1)

Sharon has added words from a Kaiser Collectables pack and a "Happy Birthday" silver outline sticker as well as decorative papers and a paper daisy with an adhesive pearl centre.

This would make a lovely Mother's Day card too!

Friday, 15 April 2016

KANGAROO STAMPED CARD

CARD WITH A KANGAROO 
We make lots of reindeer cards, and rabbit cards. There are robins and lions and bears......but it's nice to know that there are some products out there that feature Australian animals.  This kangaroon stamp, which is from a Darkroom Door set, is a great example.

I've stamped it onto craft card with black ink and just added a tiny bit of colour with a brown pencils.  The other products used are Australian too - the paper is from Ultimate Crafts Australiana series, the embossing folder (inked after use with brown ink) is from Kaiser,  and the card is, of course from Regal Craft Cards!

I haven't added a greeting but it could be anything from a birthday card to a bon voyage to a notecard to an overseas friend.

Friday, 8 April 2016

SIMPLE FOUR WINDOW CARD

HOME IS WHERE OUR ANCHOR DROPS
Sometimes the nicest cards are simple but elegant, and Sharon's card from her recent demo is a good example of this.

She has used a white smooth four window card (XSWP2) from Regal Craft Cards as her base.
The papers underneath the windows come from Kaiser, as does the greeting, which had been attached with foam tape to raise it a little above the surface.  This not only draws attention to the words but provides a place to "hide" the ends of the string from the top of the anchor charm.

Once again the design could be easily adapted for a variety of occasions.


Friday, 1 April 2016

A NEW WAY TO USE A SWING CARD

THE OPEN CARD
THE CLOSED CARD
I saw a card in a magazine recently which wasn't really like this example at all, but it did set me thinking about how cards could be folded in different ways.

This is one of Regal's swing cards (XSWI1) with an additional fold in the centre of the two larger panels.  That way, the panel no longer swings but sits out on show when the card is opened (as in the example on the left) or closed (see above).  So the the card remains closed, tuck the panels either side underneath the "Happy Birthday" panel.

I've used papers out of the paper pad from the "Old Mac" collection, but you could re-make this card in all sorts of ways - e.g. with flowers on the centre panel and patterned paper behind.

Friday, 25 March 2016

COLOURED DIE CUT ON A PHOTOSLOT CARD

Coloured Die Cut Card
This photoslot card from Regal Craft Cards features one of the dies from the Ultimate Crafts Australiana collection.

All I've done is use some alcohol markers to add some colours (any colouring media would do) and it makes a real statement on a black background.  It's actually deceptively easy to colour because you can just go off the edge with most of the shapes so you don't need to have ultra good fine motor skills (i.e. it looks much more fiddly than it actually is!).  The die-cut is from smooth white card so all that was necessary for the cocky was to add a little hint of yellow.

I've coloured in a greeting and a butterfly from the Australiana colouring pad, backed it with some green card and popped it all in a white textured photoslot card base from Regal Craft Cards

Friday, 18 March 2016

A QUICK BIRTHDAY OR FATHER'S DAY CARD

"MALE" ALL-OCCASION CARD
This is another card that Marilyn made featuring papers from the Graphic 45 "World's Fair" collection.  It would make a great Father's Day or Birthday card and is quick and easy to put together.

Using the colours featured in the patterned papers as a guide, Marilyn has double matted orange and blue plain papers as a background, and added a border made from orange linen ribbon, trimmed to a double point at the end.

The words (also cut from the paper) have been mounted using foam tape to add dimension.

Friday, 11 March 2016

SYDNEY HARBOUR HIDDEN JOURNALLING CARD

SYDNEY HARBOUR JOURNALLING CARD
This card is quick to make but can be used in a couple of ways.  "As is" it makes a great heading for a scrapbook page with plenty of space on an insert to journal details of the "weekend away" without it being on show to everyone who looks at the album.

As I've used alphabet stickers to add the words, you could easily substitute "Greetings from Australia" or even "Happy Birthday" etc and use it as a regular card.

The base is a lovely intense blue shimmer, and already has the apertures cut, as well as a third panel to fold under to "hide" the back.  (Regal's "King's Blue Rectangle 'two Square card - WIT5).  The diecut chipboard and the picture of the bridge are from Ultimate Crafts Australiana range, and the anchor is a metal charm attached with a small black split pin.

Friday, 4 March 2016

PARCHMENT SAILING SHIP CARD

PARCHMENT SAILING BOAT
Kaiser products feature in this card which would be OK for a birthday, father's day or bon voyage.

The caption is from one of the papers in their Sailaway range, and both dies are also made by them.

The slightly "tricky" feature is the ship which has been cut out of parchment paper and then embossed by hand with an embossing tool on a soft mat.  I've then used a pin to add tiny holes around the outside of the main parts.

As parchment/vellum is translucent I've cut foam tape to shape and size to fit under a couple of the sails so that although it can be seen, hopefully it just looks like part of the design.

I made this card for a recent demo, but if I were doing it for an actual card. I'd probably cut a second ship from faux wood paper for the hull and masts and just use the embossed vellum for the sails.

The base card is a large textured square white card from Regal Craft Cards(XSQPL1), and I've added just a little decoration to the inner panel, as you can see from the picture.

Friday, 26 February 2016

BLUE BUTTERFLY BEST WISHES

BLUE BUTTERFLY BEST WISHES
This is another 5 minute marvel, suited to many occasions.

Take a piece of patterned paper from the Ultimate Crafts Australiana range, stick it on top of one of Regal's singlefold dark blue cards (PL24), add a Sparklelight butterfly (stick it in the middle of the body so you can lift the wings) and finish with some rhinestones in opposite corners and a "Best Wishes" sticker.

How easy is that?!

Friday, 19 February 2016

A BON VOYAGE OR BIRTHDAY CARD

ADVENTURE CARD
This great card for the young at heart could be used for birthdays or bon voyage and for either male or female receiptients.

Marilyn has used paper from the Graphic 45 Worlds Fair Collection to fussy cut the features. The patterned background is from Kaiser.

Accents are provided by a row of gold rhinestones under the "Adventure" and in the top corner.

The card base is a singlefold ivory textured card (PL4) from Regal Craft Cards.

All in all a quick but effective card for many occasions!

Friday, 12 February 2016

MODIFIED KITE FOLD - TEABAG FOLDED CARD FOR ALL OCCASIONS

TEABAG FOLDED CARD
This is a quick card, but quite showy.  Start with a Regal square card and layer a patterned and then a plain square on top.

The motif is made by folding some doublesided paper squares into a "kite" shape and then folding the edges back (a bit like a shirt collar).
Make eight the same size and then arrange them side by side into a medallion.  (Its actually easiest if you do opposites first and then fill in the gaps).  I just used a piece of double sided tape to keep each of them in place.

If you'd like to add a focal point in the middle (or your middle is a bit dodgy) add a large topped split pin....and that's it!!

If you like the idea of teabag folding you'll find lots of different patterns on line, or come and see me in the shop for a quick demo.

Friday, 5 February 2016

IRIS FOLDED INDIAN WINDOW CARD

INDIAN WINDOW CARD
Regal's "Indian Window" card is one of their more unusual three panel cards.  The window in the middle panel is great for iris folding.

The popularity of iris folding comes and goes, but it never vails to make an impact.

I've just used a square template for the bottom of the shape (there are lots of free ones available on-line) and then "freestyled" the top.  I've chosen 80g (i.e. thin and cheap!) paper for all the colours except the gold in the centre and roof which stands out and tends to "lift" the other papers.

I've just added an adhesive jewel (Kaiser) to the "eye".  Now that I look at it in the picture, it's not exactly in the middle, is it? Oh well..........

There is plenty of room to add a greeting - at the bottom or diagonally on either side at the top or over the actual folding!
If you varied the colours it could suit almost any occasion - add a bit of lace and lots of white for a wedding card, make it in pastels for a baby or in personal favourites for either men or women.  As mentioned you can always add a bit of lace or ribbon or patterned paper or metal or embossed card or whatever you like really!  If you haven't tried Iris Folding, think about giving it a go.  Its easy and fun.

Friday, 29 January 2016

1920s LADY CARD

3D LADIES - BLUE LADY
Marilyn has added a dramatic swoosh of fabric to the front of this card, in a colour which compliments the blues of the 3D twenties girl.  The fabric is secured under a piece of white card, which is, in turn, mounted on a matching blue backing.

The base card is a white smooth single fold with an embossed border of buttons from Regal Craft Cards.  The 3D picture is from a Sparklelight sheet called "Ladies" (Code:  SLDC48883).

Friday, 22 January 2016

ORIENTAL-STYLE COLLAGE CARD

ORIGAMI COLLAGE CARD
A little oriental collage on a Royale (gold-foiled) card from Regal Craft Cards.  The Royale cards are a little larger than standard so there is more room for decoration.

The origami bird is just folded from a square of white copy paper stamped with a bamboo stamp and silver ink, and mounted on gold and red die-cut circles.

The noshi is made from lightweight red and white papers glued back to back, with gold shimmer strip in the middle and a pieces of white ribbon and gold braid around the bottom(apologies in advance to those who know how to make these properly....I just winged it ).

The square at the top is a piece of washi mounted on gold, and the card is finished with a Sparklelight sticker (also available from Regal).

Friday, 15 January 2016

CAPTAIN'S HAT CARD

CAPTAIN'S HAT CARD
This is a clever card from one of our demos last year.

Maz has hand drawn a captains hat and then fussy cut out three different layers and assembled them to fit the template.

She has used a patterned paper suggestive of the sea, and added an appropriately wavy top. An anchor charm completes the marine theme.

The base card is from Regal Craft cards, who manufacture a variety of square cards in a choice of colours and textures.

Friday, 8 January 2016

VINTAGE LADY CARD WITH SCROLLED FRAME

VICTORIAN LADY
This is the same die set I used for the Art Deco Lady cards a couple of weeks back.
Its called "Scrolled Tomentosa" and comes from Couture Creations.

Die cutting and embossing have made quite complicated cards easy to achieve in very little time.

Having decided on a neutral colour scheme I just cut the frame out in three colours (I can use the other bits to make additional frames), and reassembled it with a Victorian woman image from scrapbooking paper inside the frame.

The base card is a small ivory textured square from Regal Craft Cards, and the backing paper is embossed in a folder.  A bit of brown ink around the edges, three flowers with tiny pearls in the middle on the bottom left, and three little pearls in a row on the top right and the card is finished.

Victoriana/Vintage is not as popular a style as it once was, but it is sure to be around in one form or other for a good while yet.

Friday, 1 January 2016

RETRO STEPPER CARD

RETRO FASHION COLLAGE STEPPER CARD
Trudy Meijer has used one of Regal's stepper cards as a base for this fashion-themed work of art.  Its the sort of card which you can display all year round.

Trudy makes fabulous collage cards and this example is no exception.

Layered papers, fussy-cut images, lace, feathers, tassels and more feature on this card.  Its important to note how Trudy has retained a consistent colour scheme and theme so that the card works very well as a whole.

Friday, 25 December 2015

EGYPTIAN PYRAMID CARD

EGYPTIAN CARD - FRONT
I made this card a while ago for a demo, so it includes a few tips techniques that you can use more widely in your other cardmaking.
- You can shape your 3Ds by gently rubbing the middle of the reverse side in the palm of your hand until the edges start to curl a little. This adds dimension but also hides any foam tape/silicone glue that is underneath.
-Use the colours in the card topper as a guide for what colours to use elsewhere in your card.
The colours do not have to be the most obvious ones.  In this case I've used the gold, green and red from the band on the hat and frame around the central motifs.
-Decoration doesn't always have to be stacked on top.  It can also go underneath - in this case I've punched four windows and lined up the paper underneath (It also means you don't have to measure the paper accurately, and you can chop out the mistakes made in other projects and still use your paper.
-Do remember that a single fold card has a front, a middle and a back, and all of these surfaces can be decorated.  In this case I've used colours from the front of the card, edging from the 3D sheet (available from Regal Craft Cards) and a few cut into a gold insert to convey the idea of a pyramid.(Actually this time of year, its looking a bit like a Christmas tree......but as I said, this was a card made to illustrate a few different techniques that you can use for all sorts of things, not necessarily to make "as is", although, really it does look a bit like a pyramid in reality!)


EGYPTIAN CARD - INSIDE

Tuesday, 22 December 2015

NEW DIES

I walked in the door at work this morning to find a big box of new dies, so I thought I'd do a quick post to let you know that the Padova collection from Ultimate crafts (nature themed), Floral layers, and the Intricutz "Perfectly Petite" little doiley dies are in, so you have today and tomorrow (Wednesday) if you want some NOW....otherwise Regal Craft re opens on Monday 4th January so we might see you then!